THM - Advent of Cyber [Day 4]

Today’s task involves using burpsuite. Towards my last stint of doing ctfs and playing around with info sec tools, I was starting to really dig into the power of burpsuite. I remember THM’s burpsuite room being a good introduction. It also seems like they now have a series for burp suite? Anyway, the goals of this room involve understanding authentication, fuzzing, and using burpsuite to fuzz a login page. The task propmpts the user, if not using the in browser attack machine, to install foxy proxy on a kali box. This is the route I’m taking since I only use the in browser box when I can’t connect to my kali machine I have running on proxmox (might make a post on my massive home network overhaul once I’m down with it).
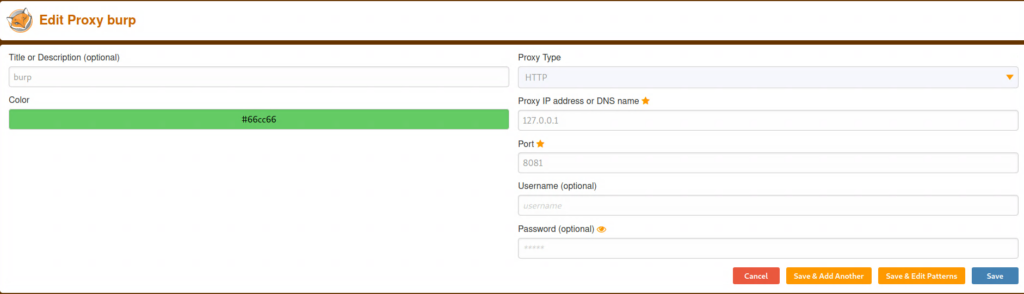
I’ve had to setup a good amount of attack machines via virtualbox, so this was a painless process for me. In case you need an example of setting up foxy proxy, here you go. First you can install foxy proxy by navigating here. Then you need to setup a new proxy by clicking on the foxy proxy icon in the top right of your browser and clicking ‘options’ and then ‘add’. Here’s the settings that you’ll need for burpsuite:
DON’T TURN THE PROXY ON, first we need to fire up burpsuite. Once you have burpsuite running, click proxy and then options. You should see the screen below:
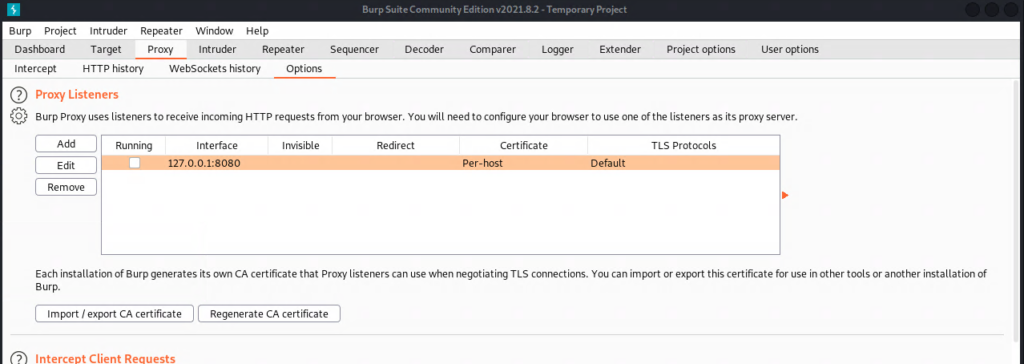
We will need to enable the proxy listener in burpsuite by simply checking the first box under ‘Proxy Listener’. Notice that these are the same settings we made in foxy proxy. Once you’ve checked the box, you can turn on foxy proxy and navigate to http://burp. This will import the proxy’s cert and allow you to more easily navigate with burpsuite intercept turned off. Click on the ‘CA Certificate’ link in the top right.

Once you’ve downloaded that, navigate to Firefox’s security settings from ‘Preferences’ as seen below:
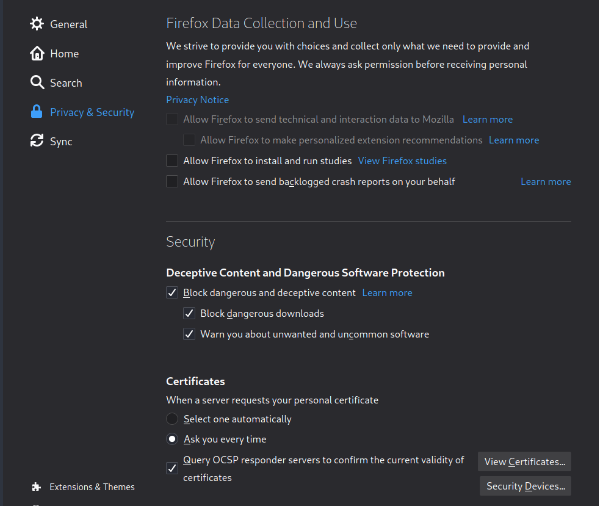
Scroll to the bottom to the ‘Certificates’ section and click ‘View Certificates’. Inside the Certificate Manager windows, click ‘import’ and import the certificate that you downloaded from the burp site. Check both boxes to allow Portswigger, the makers of burpsuite, to ID websites and email users. Click ‘ok’ for both the import window and Certificate Manager window, and there you have it. Now you can navigate with burpsuite’s intercept disabled without getting cert errors. Now that we have burpsuite set up, let’s get back to the task at hand.
We learn a little about different types of authentication including basic username/password authentication, token authentication, and bio metric authentication. The task also differentiates between authentication and authorization. A short way of remembering the difference is that every user has the same authentication (i.e bio metric), but not every user has the same authorization (i.e access to files). It also mentions the CIA triad in security (Confidentiality, Integrity and Availability), which I may make a post about in the future.
The task then explains fuzzing, which it describes as an automated means of testing a web app until it gives a vulnerability disclosure or valuable information. In the case of this room, we’re using burpsuite to fuzz a login page. The task does a great job of explaining the how to fuzz with burpsuite so I won’t go into that. I will say that it took me longer than I care to admin that the username here is ‘santa’ and not ‘cnmatic’… It’s worth a mention that you have to pay attention to the length of the response to get a good idea of what successfully logged in. I’ve seen and used rules in burpsuite to make that look a little nicer, but it’s easier to just sort by length when the fuzzing is done.